
What Is The Ideal Cannabis Feeding Schedule?
For marijuana plants to grow healthily, they need the right amount of light, carbon dioxide, and water. They also need the right nutrient mixture and an ideal cannabis feeding schedule in accordance with their growth stage.
As the plants grow in size, they would need more sustenance. Once they enter the flowering period, you will have to change the nutrient mix.
Throughout the life cycle, you must also regularly change the nutrient quantity fed to them.
In this article, you will learn how to do that by following a customized feeding schedule for growing marijuana.
Choosing your cannabis growing medium
Before we go any further, have you already selected which varieties to grow? If not, click below for some of the best cannabis seeds in the country.
Now regarding your medium, you can choose between soil or natural materials like sphagnum and coco.
You can also grow hydroponically, which means without soil, using materials like rock wool or pea gravel.
If you choose soil, you have to decide between something inert like Pro-Mix or a super soil with preloaded nutrients.
Two great super soil recipes are SubCool’s and Kyle Kushman's veganic mix – the Vegamatrix. Both do a great job!
After deciding on your soil, you have to choose your nutrients. There are many choices. I’m obviously going to suggest using Vegamatrix, or at least something organic.
Do your research. If you’re using my Veganic Super Soil (VSS), you’ll still need to add nutes, but only at 50% of the recommended dose on the food chart.
Whatever you choose, follow the cannabis feeding schedule provided by the nutrient manufacturer.
Why Grow Marijuana in Soil?
For sure, there are a whole host of reasons to grow marijuana in soil. In the wild, cannabis grows in soil, always has, and always will.
As its natural environment, this substrate is simple and more intuitive to use.
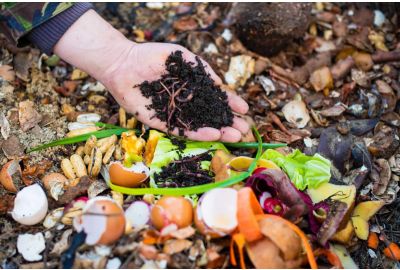
Indoors, you will most likely have to buy from a garden supply store to start, and just add nutrients as your plants grow. Another option is to compost your soil.
Composting, incidentally, is an excellent way of controlling and ensuring you have the correct nutrient and pH levels for your plants.
After completing the initial setup, maintenance is relatively simple - make sure you're watering your cannabis plants, providing nutrients, and managing the pH.
On the flip side, any extra expenses incurred will probably be replacing broken containers.
Soil can also harbor bugs and pests. You have to be more vigilant in catching problems early to avoid disappointments later.
At any rate, you may have to replace the soil before growing the next batch of plants.
Despite some of these potential problems, you cannot go wrong with soil mediums - specially if following a good cannabis feeding schedule.
It remains the most natural substrate to use, one in which your plants can thrive and reach their full potential.
Getting Started
To set up, you need soil and containers. Any high-quality organic soil mix will do.
If it seems too dense or heavy, one possible problem could be poor drainage, which suffocates the roots, hindering the absorption of oxygen. Adding 30% perlite and 10% vermiculite helps loosen and improve aeration.
Some growers use organic "super soil" - a variation of composted soil that delivers everything plants need at the right time, without adding extra nutrients or managing the pH.
One advantage it offers is that the buds produced will have a better smell/taste profile.
Avoid any commercial soil mixes that have "extended-release" nutrients.
These soil types continuously release nitrogen for up to 6 months, which is unnecessary during the plants' flowering/budding stage. An excess can, as a matter of fact, reduce overall yields.
As for growing containers, there is a wide variety of options. Plastic and terra cotta pots remain common, while fabric pots (smart pots) and air-pots are increasingly popular.
Standard gardening pots work better with perlite-mixed soil. Smart pots and air-pots, on the other hand, provide extra aeration without having to add perlite.
Using a Feed Chart
Fertilizer manufacturers provide recommended weed feed charts.
It includes information about the kinds of nutrients and mixture, how much to use, and what pH level to maintain - specific to the growth stage.
They are a good starting point but expect to make adjustments based on the needs of the marijuana strain and the growing environment.
To successfully modify a marijuana feed chart, keep a detailed daily journal. Write down the following:
- Date when you feed your plants;
- What nutrient mix you gave them;
- Dilution ratio you used.
Be alert for signs of yellowing or curling leaves on your cannabis plants. From there, you can make modifications to the nutrient mix or your cannabis feeding schedule.
Note: the cannabis plant's water and nutrient requirements are not the same for the vegetative and flowering stages. Even within a specific growth stage, you would need to make adjustments weekly as they grow large in mass.
Determine the Right Amount of Nutrients
Rapid growth and high yields are made possible by adding minerals and micronutrients to the soil. However, success depends on how much to add.
Too little (nutrient deficiency) will cause stunted growth and poor flowering. On the other hand, too much (nutrient burn or toxicity) will also result in similar problems.
Marijuana plants need plenty of nitrogen, especially in the vegetative stage. At the same time, they also require phosphorus, potassium, calcium, magnesium, and sulfur.
Furthermore, you have to provide micronutrients - minerals used in lower quantities such as zinc, iron, manganese, molybdenum, chlorine, cobalt, and more.
To calculate the correct amount of nutrients in your watering solution, you have to check the TDS or EC.
In a laboratory setting, this is usually done by evaporating the liquid and measuring the residue. For home growers, this is not applicable. A simple handheld TDS meter or ECS meter will do.
What is TDS?
TDS stands for Totally Dissolved Solids, expressed in parts per million (ppm). It measures the total quantity of minerals dissolved in water. However, it will not tell you what type of minerals are present.
Tap water typically contains calcium, magnesium, and chlorine. The ideal TDS for domestic water supplies is less than 100 ppm, but it could be as high as 400 ppm in some areas.
When you add fertilizer and micronutrients, then obviously, the TDS increases. To prevent inaccurate readings, many growers use distilled water which does not contain any particles.
TDS gives you a clear idea of the strength or concentration of your nutrient solution. It tells you how much nutrients you are feeding the plants and if they are or aren't enough.
What is EC?
Electrical conductivity, or EC, refers to how well dissolved solids conduct electricity, measured in milliSiemens or microSiemens.
When salt (sodium chloride) mixes with water, it forms charged particles called ions. Sodium, a metal, makes positive ions, while the non-metal chlorine produces negative ions.
Together, they allow the conduction of electrical currents in the water.
Distilled water has 0 EC since the distillation process removes all the microscopic solids. However, adding even a small amount of minerals can drastically change the EC.
Fertilizer mixes contain salts like nitrates and phosphates, which will affect the EC of the nutrient solution. Therefore, an elevated EC denotes a higher concentration of nutrients.
How to Regulate the TDS/EC?
The hardest part of a cannabis feeding schedule usually is calculating the TDS and EC.
Once you already have a measurement from your handheld meter, managing the nutrient concentration is very straightforward. If the TDS/EC is too high, just add more water.
Conversely, add more nutrient mix if too low. Just keep in mind that commercially-available nutrient mixes are highly concentrated - a little goes a long way.
The Ideal Cannabis Feeding Schedule for Marijuana Plants Grown in Soil
Achieving the perfect marijuana feeding schedule takes some experimentation.
The following sample schedule customized for marijuana plants should give you an idea. It begins from the first week of the plants' vegetative stage.
Note: In the seedling stage, your plants don't need additional nutrients because they still have their energy source from the seed.
Wait until they have depleted that source before you start giving them fertilizer.
When the seedlings lose their cotyledons or baby leaves and have grown 3 to 4 sets of true leaves, they begin the vegetative phase.
Vegetative Stage: Week 1
When the seedlings have transitioned to the next phase, it's time to transplant them to their next home. To keep things simple, use a pre-fertilized soil mix.
There are many brands available online, or at your neighborhood gardening supply store. Choose one that has a good texture and decent water retention and water drainage properties.
Some soil mix brands automatically adapt to be at the correct pH level for cannabis.
This is important because if the pH level is too high or too low, your plants may show signs of nutrient deficiency even though you feed them the right amount of nutrients.
Aim for a pH between 6.0 and 6.5 for the best results.
Avoid heavily fertilized soil mixes, or those that have extended or slow-release nutrients. Manually adding the nutrients throughout your plants' life cycle gives you more control.
During the first week, your young plants are still getting used to the sun's power or grow lights. For indoor cultivators, use MH (metal halide) lights to provide the correct color spectrum that marijuana needs at this phase.
If your setup involves multiple lights, use only half of them for now. Place the plants about 100 cm (40 inches) away from the lamps.
The optimum amount of light is 18 hours a day, which is equivalent to the daylight period of the summer months.
Keep the humidity level at 70%, and maintain the temperature at 23 to 25°C (73 to 77°F) for daytime, and 18°C (64°F) for nighttime.
Spray the plants daily to maintain the appropriate humidity level, but water them every other day, using about 250 ml for each plant.
One of the common mistakes novice growers make is overwatering. Watering too often will literally drown your plants, and can also result in root rot.
There is no need to add nutrients in the first week because your plants can still get enough from the pre-fertilized soil.
Vegetative Stage: Week 2
In the second week of vegetation, turn all the lights on and place them closer to the plants, about 50 cm (20 inches) away.
To prevent light burn, hold your hand underneath the light to check the heat. If it's too hot for you, then it's also too hot for your plants.
Continue with the lights on for 18 hours a day. Maintain the same temperature and humidity level as the previous week.
Turn on the fan in your grow room, and aim for the tops of your plants so that they are waving slightly in the wind. That movement will help strengthen their stems as they grow.
Give each plant 500 ml of water every other day. You can start giving your plants some nutrients at this time.
Use a fertilizer mix that is high in nitrogen as it's the most crucial nutrient for faster growth. Your target TDS/EC is 500/1.0, which will ensure the proper nutrient concentration.
Flowering Stage: Week 1
Marijuana plants will remain in the vegetative stage until the onset of autumn. To simulate this process indoors, change your light schedule to 12 hours on, 12 hours off.
Switching to HPS (high pressure sodium vapor) lights is appropriate during this week.
HPS emits a pink/orange light that flowering plants love, unlike the bluish MH light that is more suitable for the veg stage.
Use only half of the grow lights while your plants are shifting to the flowering stage, at a distance of 50 cm (20 inches).
You can use the same high-nitrogen nutrient mix because the plants are still growing; adjust the nutrient program in the coming weeks.
Plants in the flowering stage need more water, so allot 1 liter per plant every other day.
Feed them from below by spraying the nutrient solution around the base. Check that the TDS/EC is at 600/1.2.
Keep the temperature at 25°C (77°F) for daytime, and 18°C (64°F) for nighttime.
A fan will prevent excessively hot or cold spots in the grow room by moving the air around.
It will also help maintain the ideal humidity at 60%, which is lower than the prior week.
Flowering Stage: Week 2
Now is the time to turn on all your HPS lamps while sticking to the 12-hour light schedule.
The plants will grow at an explosive rate, so check every day that they are less than 50 cm (20 inches) from the lamps.
The humidity level should stay at 60%, but temperatures are slightly higher at 26°C (79°F) in the daytime and 19°C (67°F) at night.
Each plant should receive 2 liters of water every other day, and the nutrient level should be at 650 TDS/1.3 EC.
By the end of this week, rinse the soil with 6.5 pH freshwater to prepare them for Week 3.
Flowering Stage: Week 3
Flower development begins at this period, and the plants will require more phosphorus for the growth of buds. It's time to switch to a high-phosphorous mix like a bloom fertilizer.
Rinsing out the soil first removes the excess nitrogen, and allows your plants to absorb the phosphorus more quickly.
Adjust the nutrient level to 700 TDS/1.4 EC, and continue giving each plant 2 liters of water. Your plants will need more moisture, so check that the soil stays a little damp.
The light schedule, temperature, and humidity are unchanged for this week.
Important: Cannabis pre-flowers will start to appear and give you clues for the plant's sex.
Don't forget to remove the male plants as soon as you identify them! Neglecting to do so will cause the females to develop seeds instead of buds.
Flowering Stage: Week 4
Increase each plant's water supply to 2.5 liters every other day. You can also raise the nutrient concentration to 1.5 EC.
Maintain the light schedule and temperature, but don't let the humidity go higher than 50%.
Carefully monitor the color and shape of the leaves and get rid of any bugs right away.
Flowering Stage: Week 5
There will be significant bud growth during this week.
Retain the light, watering schedules, temperature, and humidity to keep it going.
Feed the plants with a stronger 800 TDS/1.6 EC nutrient solution at the beginning of the week, but flush them with 6.5 pH water at the end of the week.
Flowering Stage: Week 6
Your plants will require more potassium now to help the buds ripen and harden.
In addition to a regular bloom fertilizer, use a booster for more potassium. Just don't let the TDS/EC exceed 850/1.7.
Maintain the atmospheric conditions, and watch out for mold and pests.
A lower humidity of 40% will help you prevent diseases, so keep the grow space well-ventilated.
Proper air circulation will also ensure that your plants get all the carbon dioxide they need.
Flowering Stage: Week 7
At this time, the buds will increase in size and continue to ripen.
The plants will produce lots of dense resin that contains strong terpenes. The leaves at the bottom of the plants might start to go yellow and die, but that's normal.
It is unnecessary to change the light and water timetables, but lower the nutrient concentration to 750 TDS or 1.5 EC to prepare for harvesting.
The temperature and humidity should be the same from Week 6 until Week 8.
Flowering Stage: Week 8
Flush the soil with fresh water right before the beginning of this week, and then feed the plants with a weaker nutrient mix at a 250 TDS/0.5 EC concentration.
Stop giving them fertilizer a few days before harvest, and just use plain water. Doing so prepares the soil for reusing the next batch of plants.
One last reminder: Be on guard for bud rot, an infection that is hard to spot unless you examine the cores of the marijuana buds.
This is an insidious fungal disease that spreads easily and could ruin an entire harvest. Bud rot is one of the reasons humidity must be kept so low during the flowering stage.
Follow the Ideal Cannabis Feeding Schedule for Optimal Results
Throughout your marijuana plants' life cycle, they will need different amounts of nutrients during different growth stages. That's why a cannabis feeding schedule is so important.
The most essential nutrient during the vegetative stage is nitrogen, while phosphorus and potassium are critical in the flowering stage.
Knowing how much and when to feed your plants are the key factors in determining the success of your harvest.
Growers can ensure the right concentration of nutrients by checking the TDS or EC with a handheld meter. Too high can cause a nutrient burn, while too low will result in nutrient deficiency.
The unfortunate effects of either condition are slow growth and poor yield.
Moreover, learn how to water your plants properly, so that they can properly absorb the nutrients that you are feeding them.
If you stick to the ideal cannabis feeding schedule, your plants will be happy and healthy.
When harvest time comes, they will surely give you something to smile about.
Want to keep learning? Check out our PotCast episode about cannabis feeding schedules!